Table of Contents
- Why Sticky Grime Clings to Bins (and Why It Matters)
- Tools and Supplies That Remove Sticky Grime Without Damage
- How to Remove Sticky Residue from Plastic Bins Step by Step
- The Best Cleaner for Sticky Trash Can Residue
- How to Deodorize a Trash Can After Grime Removal
- How to Keep Flies Away from Outdoor Trash Cans
- Common Mistakes That Spread Sticky Grime
- Conclusion
- Frequently Asked Questions
Last Updated: October 18, 2026
Why Sticky Grime Clings to Bins (and Why It Matters)
Sticky grime on bins is a mix of food sugars, grease, dried liquid, and adhesive left behind by labels and stickers. That film traps odor and gives flies a food source.
Here’s the part most guides skip: the sticky stuff in your bin usually isn’t sticker adhesive at all.
Why does it matter? A tacky surface keeps collecting grime. Wipe it once and it comes back in a week. Kill the sticky layer and the bin stays cleaner far longer.
Tools and Supplies That Remove Sticky Grime Without Damage
The right kit is simple and cheap. You probably own most of it already. The key is matching the cleaner to the surface so you don’t scratch or cloud the plastic.
Gather these:
- Dish soap and warm water
- White vinegar
- Rubbing alcohol
- Baking soda
- A hair dryer or heat gun on low
- A plastic scraper or old credit card
- Paper towels and a cotton ball or two
- Olive oil or cooking oil
- Rubber gloves
Skip metal scrapers, steel wool, and harsh solvents. They gouge plastic and leave scratches that trap grime forever. The EPA’s household hazardous waste guidance is a good reminder to store solvents safely and never pour them down a storm drain.
How to Remove Sticky Residue from Plastic Bins Step by Step
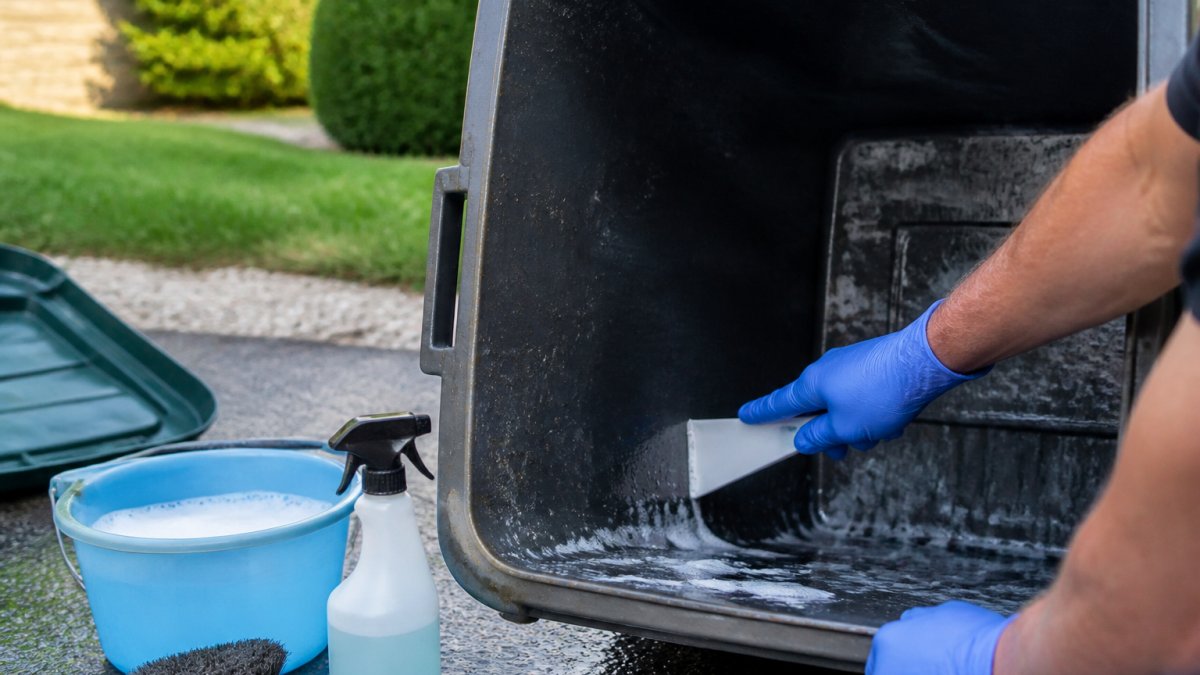
This is the core method, and it works on plastic containers, storage bins, and organizers too. Follow the steps in order. Each one softens the grime before you scrape, which is what saves the plastic.
Step 1: Clear Loose Debris and Identify the Grime
Empty the bin and toss loose trash. Then look closely at the sticky patch. Is it glue from a sticker, or greasy food film? That answer picks your method.
Most sticky grime in a bin is not sticker adhesive at all. It is usually one of three things:
- Grease and oil film from takeout containers, meat packaging, or cooking oil bottles. It feels slick when wet and tacky when dry.
- Dried sugar from juice, soda, syrup, or produce that leaked and dried into a candy-like layer.
- Adhesive from labels, stickers, or the glue strip on bags and liners.
Mixed grime is common, a greasy patch with a sticker stuck to it. In that case, degrease first, then treat the adhesive. Testing an inconspicuous area protects the finish before you commit.
Step 2: Loosen the Adhesive with Heat
Warm the sticky spot with a hair dryer on medium for 30 to 60 seconds. Hold it a few inches away and keep it moving. Heat softens adhesive so it lifts instead of smearing.
A heat gun works faster, but keep it on the lowest setting and never hold it still. Plastic can warp or melt if you focus heat in one spot.
Skip heat on greasy film, it just spreads the grease. Heat is for adhesive only.
Step 3: Apply a Solvent and Let It Soak
Choose your solvent based on the grime:
- Dish soap and hot water: best for greasy sticky grime and general cleaning
- White vinegar: breaks down sticky film and light mineral deposits
- Rubbing alcohol: cuts sticker adhesive and dries fast
- Olive oil or cooking oil: loosens stubborn glue and is gentle on plastic
- Baking soda paste: lifts sticky grime and scrubs without scratching
Apply, then let it soak for 5 to 10 minutes. Soak time matters. Rushing this step is why people scrub hard and scratch the bin. For tough spots, a cotton ball soaked in rubbing alcohol held against the adhesive works well.
For greasy film, use the hottest water you can stand with a few drops of dish soap. Hot water melts the grease so the soap can lift it. Cold water just smears it around.
Step 4: Scrape, Wipe, and Rinse
Scrape gently with a plastic scraper, working with the surface, not against it. Wipe with a paper towel, then rinse with warm water. Dry the bin fully before you use it again. Leftover moisture plus warmth is exactly what bacteria want.
Step 5: Match the Method to the Bin Material
Not every bin is the same plastic, and the wrong cleaner can cloud or weaken it.
- Polyethylene (most curbside and storage bins): tolerant of most household cleaners. Avoid strong solvents like acetone, which can dull the surface.
- Polypropylene (many indoor wastebaskets): similar tolerance, but scratches show more. Stick to non-scratch scrubbers.
- Clear or painted plastic: the most fragile finish. Test alcohol and oil on a hidden spot first; both can cloud clear plastic or lift paint.
- Metal or coated bins: vinegar is fine on stainless, but avoid prolonged soaking, which can pit or stain. Skip abrasive pads on coated finishes.
When in doubt, test a small hidden area and wait a few minutes before committing.
Step 6: Work Safely
Ventilate when using rubbing alcohol or any solvent, and keep them away from flames, alcohol fumes are flammable. Wear gloves if you have sensitive skin. Never mix bleach with vinegar or other cleaners; it creates dangerous fumes. Use one cleaner at a time and rinse between them.
The Best Cleaner for Sticky Trash Can Residue
There’s no single magic bottle. The best cleaner for sticky trash can residue depends on what made the mess. For most homes, a mix of dish soap and hot water handles the bulk of it.
Here’s a quick decision table:
| Grime Type | Best Cleaner | Soak Time | Watch Out For |
|---|---|---|---|
| Sticker or label adhesive | Rubbing alcohol or oil | 5-10 min | Test on painted plastic first |
| Greasy food film | Dish soap and hot water | 5 min | Needs a real rinse |
| Dried sugary spills | Warm water and vinegar | 10 min | Re-soak if still tacky |
| Mystery sticky spots | Baking soda paste | 5 min | Don’t scrub hard |
Commercial adhesive removers and solvents like WD-40 work, but use them sparingly and rinse well. They can dull some finishes. Always test an inconspicuous area first.
How to Deodorize a Trash Can After Grime Removal
Killing the sticky layer removes most of the smell, but odor hides in the places a quick wipe misses. This is the step most guides skip, and it is where a bin-specific routine beats generic sticker advice.
Find the Source Before You Deodorize
Odor comes from three places: leftover grime, moisture, and the seams and corners where both collect. Before you treat the smell, run a finger along the inside rim, the lid edge, the bottom corners, and any hinge or handle recess. If it feels tacky or slick, grime is still there and deodorizing will only mask it.
Rinse and Dry Completely
Rinse the bin with clean water after grime removal, dirty rinse water just re-coats the surface. Then dry it fully. Turn it upside down in the sun or wipe it dry with a clean cloth. Moisture plus warmth is what bacteria and flies need, so a wet bin will smell again fast.
Absorb Lingering Odor
Sprinkle baking soda inside the dry bin and let it sit overnight. It absorbs lingering odor. Vacuum or rinse it out the next day. For a deeper refresh, wipe the inside with white vinegar and let it air dry in the sun. Sunlight helps kill odor-causing bacteria.
A cotton ball with a drop of lemon essential oil on a shelf nearby adds a fresh scent, but keep oils out of the bin itself, they can leave a film that attracts grime.
Treat the Seams and Corners
If odor keeps coming back, the grime is still hiding in the seams and corners. That is a sign to do a full soak rather than a spot wipe. Fill the bin with hot water and a squirt of dish soap, let it sit, then scrub the seams with a small brush. Rinse and dry fully.
Keep Odor From Returning
- Rinse food residue before it dries and turns sticky
- Keep the lid closed tight
- Bag food waste before it goes in
- Wipe the rim and lid edge weekly with white vinegar
- Clean the bin on a schedule, not just when it smells
A monthly deep clean keeps odor down all year. If the smell returns within days of a full clean, check the lid and the outside of the bin, grime drips down and collects where people rarely look.
How to Keep Flies Away from Outdoor Trash Cans
Flies show up for one reason: food and moisture. Remove both and the flies leave. Keeping outdoor cans dry and rinsed is the single most effective habit.
- Rinse food residue before it dries and turns sticky
- Keep the lid closed tight
- Store cans in shade, not direct sun
- Bag food waste before it goes in
- Clean the bin on a schedule, not just when it smells
A sticky bin is a fly magnet. Grime gives them a food source and moisture gives them a place to breed. Break the cycle by removing the tacky film regularly. Many homeowners find a monthly deep clean keeps flies down all summer.
Wipe the inside rim and lid edge with white vinegar after each trash pickup. Those are the spots flies land on first, and a quick weekly wipe stops grime from building there.
Common Mistakes That Spread Sticky Grime
A few habits make the problem worse. Avoid these and your bins stay cleaner between deep cleans.
- Scrubbing dry: This smears adhesive and grinds grit into the plastic. Always soften first.
- Using metal tools: They scratch the surface, and scratches trap grime and odor.
- Skipping the soak: Rushing to scrape is how bins get damaged.
- Forgetting the lid and rim: Grime hides there and drips back down.
- Rinsing with dirty water: You just re-coat the bin. Use clean water.
- Ignoring the seams: Grime collects in corners and keeps the smell alive.
Never mix bleach with vinegar or other cleaners. It creates dangerous fumes. Use one cleaner at a time and rinse between them.
Conclusion
Sticky grime is stubborn, but it’s beatable with heat, the right solvent, and a little patience. Soften first, soak, then scrape gently. Your bins will stay cleaner and smell better for longer.
If the job feels like too much, or you’d rather never touch a grimy bin again, that’s where we come in. Chester County Clean Cans uses 200° hot water and eco-friendly methods to sanitize, deodorize, and remove grime, with service completed within 24 hours. Choose monthly, quarterly, or a one-time clean, and just leave your bins curbside.
Frequently Asked Questions
What removes heavy sticky grime from trash bins?
Heavy sticky grime usually needs two stages: heat to soften the adhesive, then a solvent to dissolve what remains. A hair dryer on medium heat loosens sticker and label glue, while white vinegar, rubbing alcohol, or a paste of baking soda and dish soap breaks down the residue. Let the solvent sit for a few minutes before wiping. For thick buildup, repeat the heat-and-soak cycle rather than scraping hard, which can scratch plastic bins.
Is vinegar safe to use on plastic bins?
White vinegar is safe for most plastic storage bins and trash cans when diluted with warm water. It cuts through sticky grime and neutralizes odors without leaving a harsh chemical film. Test an inconspicuous area first, especially on colored or textured plastic, and avoid leaving undiluted vinegar on the surface for long periods. Rinse thoroughly after use so the acid does not linger and attract pests.
How do you remove sticky residue without scratching plastic?
Skip metal scrapers and abrasive pads. Use a plastic scraper, an old credit card, or a silicone spatula to lift softened adhesive. Warm the residue first with a hair dryer or a cloth soaked in hot water, then apply olive oil, rubbing alcohol, or dish soap to loosen it. Wipe with a paper towel or microfiber cloth. Patience and heat do more than force, and the plastic surface stays smooth.
Can dish soap remove sticky grime from bins?
Dish soap works well as a first pass and as a carrier for other cleaners. Mix a few drops with warm water, apply it to the sticky area, and let it sit for several minutes. It lifts greasy residue and food film, but it struggles with cured adhesive from labels or stickers. Pair dish soap with baking soda for a paste, or follow up with vinegar or rubbing alcohol to finish the job.