
Table of Contents
- Why Sanitizing Outdoor Recycling Bins Matters
- What You’ll Need to Clean and Sanitize Recycling Bins
- How Often to Clean Recycling Bins for Optimal Hygiene
- Step-by-Step: How to Clean Recycling Bins Properly
- How to Keep Recycling Bins from Smelling Between Cleanings
- Material-Specific Care and Wastewater Disposal
- Common Mistakes to Avoid When Sanitizing Recycling Bins
- Frequently Asked Questions
Last Updated: October 11, 2026
Why Sanitizing Outdoor Recycling Bins Matters
A dirty recycling bin isn’t just an eyesore. It’s a breeding ground for bacteria, insects, and mold that can spread to your home and yard. Food residue left in bins attracts pests and creates foul odors that linger long after collection day.
The real issue is that most people rinse their bins with cold water and call it clean. That doesn’t kill bacteria or remove sticky residue. Sanitizing goes deeper. It eliminates the microorganisms causing the smell and the pest problems.
Don’t wait until your bin smells terrible to clean it. A regular sanitizing schedule prevents odor buildup, pest infestations, and the need for deep cleaning later.
What You’ll Need to Clean and Sanitize Recycling Bins
Gather these supplies before you start. Having everything ready makes the job faster and more effective.
Basic supplies:
- Garden hose with spray nozzle
- Handled scrub brush (long handle keeps you away from splashing)
- Protective gloves
- Spray bottle
- Bucket for mixing
Cleaning solutions:
- Dish soap (mild and effective)
- White vinegar (natural deodorizer)
- Baking soda (odor control)
- Hot water (your most powerful tool)
Best Cleaner for Outdoor Recycling Bins
The best cleaner combines simplicity with effectiveness. A mixture of hot water, dish soap, and white vinegar works well for most bins. This combination cuts through grease, kills odor-causing bacteria, and is safe for your yard and local water systems.
For stubborn sticky residue or mold, add baking soda to create a gentle abrasive paste. Mix one part baking soda with three parts water. This removes buildup without scratching plastic or metal bins.
Avoid bleach-based cleaners when possible. They’re harsh on the environment and can damage bin materials over time. If you do use a disinfectant spray, choose one labeled eco-friendly and follow the contact time on the label.
Hot water is your most powerful sanitizing tool. Combined with simple dish soap, it removes food residue and kills bacteria more effectively than cold water alone.
How Often to Clean Recycling Bins for Optimal Hygiene
A one-size-fits-all schedule doesn’t work. How often you sanitize depends on your climate, what goes in your bin, and how quickly problems develop. Use this framework to build a schedule that prevents odors and pests without over-cleaning.
Base Frequency by Climate and Season
Cool climates (below 60°F average): Once per month is usually sufficient. Bacteria and mold grow slowly in cold temperatures, and food residue breaks down more slowly.
Moderate climates (60-75°F): Every 2-3 weeks. Warm temperatures accelerate bacterial growth and odor development. If you notice smells by week two, shift to a two-week schedule.
Hot climates (above 75°F): Every 10-14 days during peak season (May-September). Heat doubles the rate of bacterial growth and intensifies odors. In winter, you may revert to monthly cleaning.
Adjust Based on What Goes in Your Bin
Dry recyclables only (paper, cardboard, clean plastics): Monthly cleaning is usually enough. These items don’t attract pests or create strong odors.
Mixed recyclables with food containers: Every 2 weeks. Even rinsed containers leave residual moisture and food particles that feed bacteria.
Contaminated or wet items: Every 7-10 days. If you accidentally place wet food scraps, greasy takeout containers, or damp cardboard in the bin, bacteria bloom rapidly. Clean sooner rather than waiting for odors to develop.
Trigger-Based Cleaning (Don’t Wait for the Schedule)
If any of these occur, sanitize immediately, don’t wait for your next scheduled date:
- Visible mold or slime on interior surfaces
- Pest activity (ants, flies, maggots, or rodent droppings)
- Foul odors noticeable from 5+ feet away
- Sticky residue that doesn’t rinse away with water
- Discoloration or dark spots on the bottom or corners
Collection Frequency Matters
If your local waste management picks up recycling weekly, bacteria have only 7 days to multiply. Monthly cleaning works well.
If pickup is every two weeks, bacteria have twice as long to establish. Shift to a 10-14 day cleaning schedule, especially in warm months.
If pickup is monthly, clean every 2-3 weeks to prevent severe buildup.
A Practical Schedule Template
For most households in moderate climates:
- Mark your calendar for the day after collection day
- Clean every 2-3 weeks (14-21 days)
- Do a quick rinse and visual inspection on collection day to catch problems early
- In summer, move to every 10 days if odors develop
For households with frequent food contamination:
- Clean every 7-10 days year-round
- Rinse the bin weekly with water to remove loose debris
- Sprinkle baking soda after each cleaning to extend the time between deep cleans
For households in hot climates:
- Clean every 10-14 days May-September
- Revert to every 3-4 weeks October-April
- Monitor for odors in late spring and early fall when temperatures fluctuate
Set a phone reminder for your cleaning day. Consistency prevents problems from building up. A bin cleaned on schedule never develops the severe mold, pest infestations, or odors that require emergency deep cleaning.
Step-by-Step: How to Clean Recycling Bins Properly
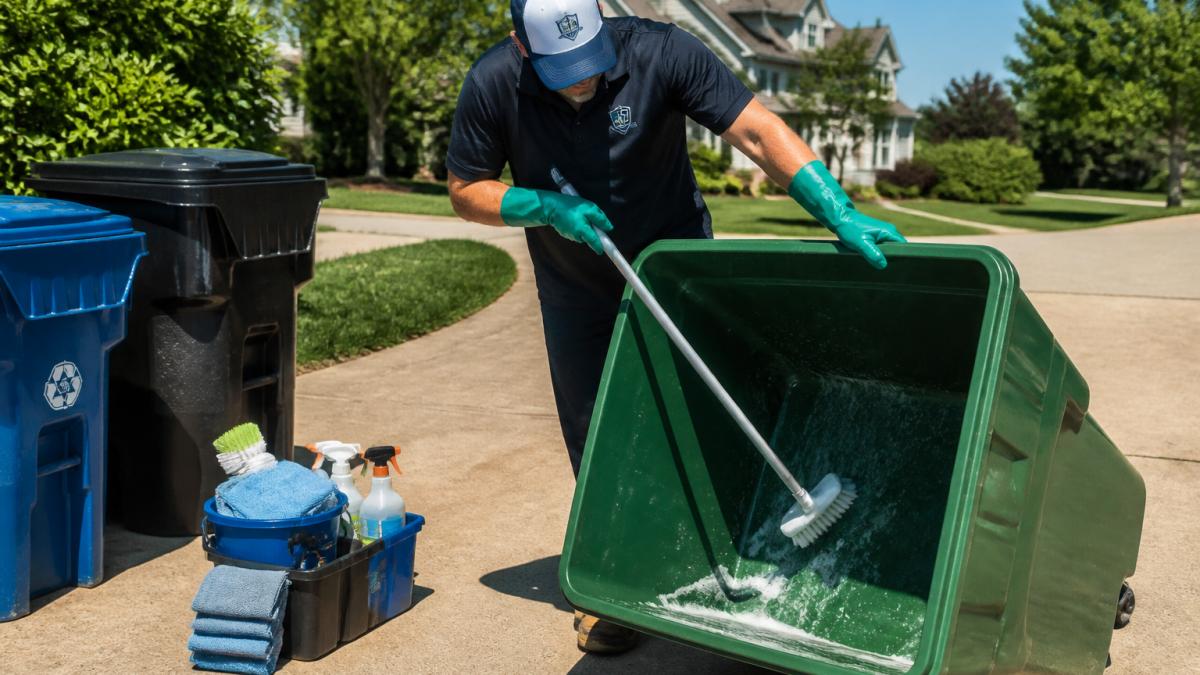
Step 1: Remove Leftover Food and Debris
Empty your bin completely. Don’t just rinse around leftover food. Use your gloved hand or a small tool to scrape out stuck-on food, paper, and debris from the bottom and corners.
Pay special attention to the corners where wet garbage collects. This is where mold and odor start. Remove all visible debris before adding water.
Step 2: Rinse the Interior and Exterior
Use your garden hose to rinse the inside thoroughly with cool water first. This removes loose food and debris. Then spray the outside to rinse away dirt and dust.
Work from top to bottom so dirty water runs downward. Don’t skip the bottom corners or the underside of the lid.
Step 3: Scrub All Surfaces
Mix hot water with dish soap in your bucket. Use your handled brush to scrub the interior walls, bottom, and lid. Pay extra attention to corners and crevices where residue hides.
For the exterior, scrub high-traffic areas where hands touch the bin. Scrub the underside of the lid where moisture collects. Don’t forget the bottom edges where the bin sits on the ground.
Step 4: Apply Your Sanitizing Solution
Mix your chosen sanitizing solution. For a standard mix: one part white vinegar to three parts hot water. Add a tablespoon of dish soap to help it cling to surfaces.
Pour or spray this mixture inside the bin. Let it coat all interior surfaces. For stubborn spots, apply baking soda paste and let it sit for 5 minutes before scrubbing again.
Step 5: Let the Solution Work
Don’t rinse immediately. Let the sanitizing solution sit for 10-15 minutes. This contact time allows the solution to kill bacteria and break down odor-causing compounds.
For heavily soiled bins, extend this to 20 minutes. The longer contact time is especially important if you’ve had pest or mold problems.
Don’t let the solution dry completely on the bin. Dried residue can leave marks and reduce effectiveness. Set a timer so you don’t forget to rinse.
Step 6: Final Rinse and Air-Dry
Rinse thoroughly with clean water. Use your hose to remove all soap, vinegar, and baking soda residue. Rinse the exterior as well.
Tip the bin slightly to drain excess water from the bottom. Leave the lid open and let the bin air-dry in the sun. Sunlight naturally kills remaining bacteria and helps eliminate odors.
How to Keep Recycling Bins from Smelling Between Cleanings
Prevention is easier than deep cleaning. Line your bin with newspaper or paper bags before adding recyclables. These absorb excess moisture that feeds bacteria and mold.
Rinse food containers before placing them in the bin. Remove wet food scraps completely. Dry items don’t attract pests or create odor.
Keep the bin lid closed between collection days. This reduces moisture buildup and prevents pests from accessing the contents. A sealed bin also contains odors better.
On hot days, place your bin in shade if possible. Heat accelerates bacterial growth and intensifies odors. Even partial shade helps.
Sprinkle baking soda on the bottom of your bin after cleaning. This absorbs moisture and neutralizes odors for weeks. Reapply after each cleaning.
Material-Specific Care and Wastewater Disposal
Most recycling bins are plastic or metal. Both handle hot water and soap well, but there are small differences.
Plastic bins: Avoid extremely hot water (above 130°F) which can warp plastic over time. Hot water from your hose is fine. Don’t use abrasive scrubbers that scratch the surface where bacteria can hide.
Metal bins: Metal bins tolerate hot water better than plastic. They’re durable but can rust if left wet. Air-dry completely after cleaning, and consider a light coat of car wax annually to protect the finish.
The soap, vinegar, and baking soda are biodegradable and eco-friendly.
If you use a commercial disinfectant, check the label for environmental safety. Some products require special disposal. Most eco-friendly options are safe to rinse into normal drainage.
Common Mistakes to Avoid When Sanitizing Recycling Bins
Don’t skip the scrubbing step. Rinsing alone doesn’t remove sticky residue or kill bacteria effectively. You need friction from a brush to break down buildup.
Don’t use cold water expecting it to sanitize. Cold water removes loose debris but doesn’t kill bacteria or remove grease. Hot water is essential for actual sanitizing.
Don’t clean only the interior. The exterior touches your hands and your yard. Dirty exteriors spread bacteria to your home and attract pests.
Don’t let the bin sit wet after cleaning. Moisture breeds mold and bacteria. Always air-dry in sunlight when possible.
Don’t forget the lid. The underside collects moisture and becomes a mold hotspot. Clean it as thoroughly as the bin itself.
Keeping your recycling bin clean and sanitized protects your home from odors, pests, and bacteria. A simple monthly routine using hot water, dish soap, and white vinegar eliminates most problems before they start. For those who prefer a hands-off approach or deal with severe contamination, professional sanitizing services like Chester County Clean Cans use specialized equipment and 200° hot water to deep-clean bins thoroughly within 24 hours. Whether you handle it yourself or call professionals, the key is consistency. A regular cleaning schedule keeps your outdoor space fresh and hygienic year-round. Get a quote today to see how Chester County Clean Cans can simplify bin maintenance for your home.
Frequently Asked Questions
How often should you clean outdoor recycling bins?
Most households benefit from cleaning recycling bins every 2-4 weeks, depending on usage and climate. If your bin develops odors, visible residue, or attracts pests, clean it sooner. Families in warmer climates or those with high food-waste volume may need monthly cleaning. Consider a quarterly deep sanitization even if bins appear clean, to eliminate bacteria and mold buildup that isn’t visible to the eye.
What is the best cleaner for outdoor recycling bins?
White vinegar and baking soda are effective, eco-friendly options for routine cleaning. Dish soap with hot water works well for greasy residue. Always rinse thoroughly afterward to prevent residue on recyclables.
Is white vinegar good for cleaning bins?
Yes, white vinegar is an excellent choice for sanitizing recycling bins. Its acidic nature breaks down sticky residue, kills odor-causing bacteria, and is safe for your yard and local waterways. Mix equal parts white vinegar and water in a spray bottle, apply it to bin surfaces, let it sit for 10-15 minutes, then scrub and rinse. It’s particularly effective for deodorizing and works well as a routine maintenance cleaner between deeper sanitizations.
Can I put something in my recycling bin to stop it from smelling?
Yes. Line the bottom with newspaper or paper bags to absorb moisture and food residue. Baking soda sprinkled inside acts as a natural deodorizer. Rinse food containers before placing them in the bin to reduce sticky residue and bacteria growth. Ensure the bin has adequate drainage holes so moisture doesn’t accumulate. For persistent odors, seal wet garbage in a separate bag before placing it in the bin, and consider more frequent cleaning or a professional sanitization service.