
Table of Contents
- Why Bacteria Growth in Garbage Bins Happens Fast
- How to Clean Garbage Bins Step by Step
- How to Sanitize a Trash Can Without Damaging It
- How Often to Clean Trash Cans (and What Changes With the Season)
- How to Keep Flies Away From Outdoor Trash Cans
- Indoor Bins, Bin Materials, and the Mistakes That Undo Your Work
- How to Tell Your Bin Is Actually Clean
- When DIY Cleaning Stops Being Enough
- Frequently Asked Questions
Last Updated: October 5, 2026
Why Bacteria Growth in Garbage Bins Happens Fast
Bacteria growth in garbage bins is the rapid multiplication of microorganisms feeding on food residue, moisture, and warmth inside the container.
Most homeowners blame the trash itself. The real problem is what stays behind after the bag comes out.
Every time you toss a bag, liquid, grease, and food particles stay stuck to the walls and bottom.
This guide from Chester County Clean Cans covers why bins turn so fast, how to clean them properly, and when it’s time to hand the job off.
The Four Conditions Bacteria Need
Bacteria need four things to multiply: food, moisture, warmth, and time. Remove any one and growth slows dramatically.
Here’s what each looks like in a typical bin:
- Food: leftover food, grease, and sticky residue on the walls
- Moisture: liquids, dampness, and condensation under the lid
- Warmth: hot weather, direct sunlight, and a closed lid that traps heat
The lid is the sneakiest of these. Most people scrub the walls and never touch the underside of the lid, where splashes collect and stay damp.
Remove the moisture and the food, and you’ve broken the cycle.
How to Clean Garbage Bins Step by Step
Cleaning a garbage bin properly takes about 20 minutes and removes the residue that feeds bacteria and odor. For a standard plastic bin, you need a hose, a stiff brush, and mild soap.
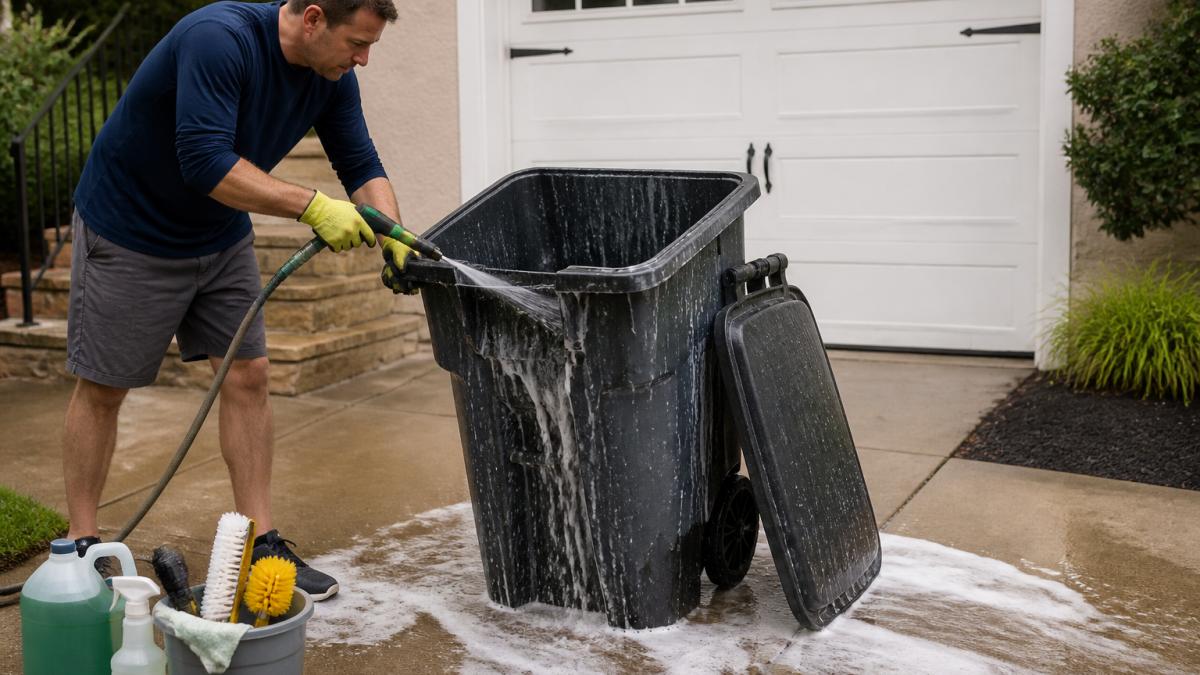
What You’ll Need
- A garden hose or a bucket of warm water
- A stiff-bristled brush
- Dish soap or a mild all-purpose cleaner
The Cleaning Steps
- Empty the bin completely and check the bottom for stuck debris.
- Rinse the inside with a hose to loosen grime and food residue.
- Scrub the walls, floor, and lid with soapy water and a stiff brush.
- Pay attention to the lid edge and the underside of the lid.
- Rinse everything until the water runs clear.
- Disinfect with white vinegar or diluted bleach.
- Air-dry the bin upside down in direct sunlight.
Drying matters as much as scrubbing. A damp bin starts growing bacteria again within a day.
How to Sanitize a Trash Can Without Damaging It
Sanitizing a trash can means reducing the bacteria left after cleaning, not just removing visible grime. Cleaning removes the food and residue bacteria feed on; sanitizing knocks down what’s still clinging to the surface.
The right method depends on your bin’s material and what the product label says. Disinfectants are registered with the U.S. Environmental Protection Agency, and the label lists approved surfaces, contact time, and whether rinsing is needed.
How Disinfection Actually Works
Most household disinfectants kill bacteria by breaking down cell walls or disrupting proteins, and that takes time. A product claiming to kill 99.9% of bacteria usually needs the surface to stay wet for the full contact time listed, often several minutes, not seconds.
That’s why scrubbing first matters: dirt, grease, and biofilm shield bacteria from the disinfectant. Spray a greasy bin wall and the product works on the grease, not the bacteria underneath.
Vinegar, Bleach, or Boiling Water: What Actually Works
Each option has a place, but they are not interchangeable, and none of them should be mixed with each other.
| Method | Best For | Watch Out For |
|---|---|---|
| White vinegar | Everyday deodorizing and light residue | Not an EPA-registered disinfectant; weak on heavy grease |
| Diluted bleach | Deep sanitizing on sturdy plastic | Can fade or crack plastic over time; never mix with vinegar, ammonia, or other cleaners |
| Boiling water | Rinsing sturdy bins after scrubbing | Warps thin plastic and can loosen adhesives on wheels |
| Hot soapy water | Routine washing before disinfecting | Cleans but does not disinfect on its own |
| EPA-registered disinfectant spray | Targeted sanitizing when label directions are followed | Requires full contact time; check the label for surface compatibility |
White vinegar is a reasonable everyday choice for odor and light residue, but it is not a registered disinfectant, treat it as a deodorizer and mild cleaner, not a bacteria killer.
Whatever you choose, disinfect after cleaning, not instead of it, and read the product label first for contact time, safe surfaces, and rinsing.
Never mix bleach with vinegar, ammonia, or any other household cleaner. The combination can release toxic gases. Use one product at a time, rinse between steps, and ventilate the area.
Matching the Method to the Material
- Plastic bins: tolerate most methods, including diluted bleach and hot water. Avoid abrasive pads that scratch the surface and give bacteria places to hide.
- Metal bins: can rust at seams and hinges. Use mild soap and a non-bleach disinfectant, dry thoroughly, and avoid soaking.
- Bins with wheels or sensors: keep water away from moving parts and electronics. Wipe surfaces with a damp cloth and a compatible cleaner rather than hosing them out.
After sanitizing, air-dry the bin upside down in direct sunlight. A damp bin starts growing bacteria again within a day, so drying is part of sanitizing, not an optional finish.
How Often to Clean Trash Cans (and What Changes With the Season)
Most households should clean trash cans monthly, but hot weather and food waste push that to every two weeks.
Here’s a simple schedule to follow:
- Weekly: rinse the bin after collection if food waste was heavy
- Monthly: full scrub, disinfect, and air-dry
- Every two weeks in summer: same full clean, more often if you notice flies
Summer breaks people: heat speeds up bacterial growth and draws flies within days. A bin in direct sun needs more attention than one in the shade.
Recycling bins need cleaning too. Rinse jars and cans before tossing them, and wash the bin monthly to prevent sticky residue buildup.
How to Keep Flies Away From Outdoor Trash Cans
Keeping flies away from outdoor trash cans comes down to removing what attracts them: food waste, moisture, and odor.
Start with the basics:
- Keep the lid closed and make sure it seals
- Bag all food waste before it goes in
- Rinse containers before recycling them
A tight lid does more than any spray. Flies follow smell, and an open or cracked lid lets that smell escape all day.
If maggots show up, act fast. Empty the bin, scrub it with hot soapy water, disinfect, and let it dry fully in the sun.
Indoor Bins, Bin Materials, and the Mistakes That Undo Your Work
Indoor bins need more frequent attention than outdoor ones because they hold food waste longer in a warm space. A kitchen bin with no liner and no rinse is a bacteria factory, and it sits in the room where you cook and eat.
Food-Waste Handling Before It Hits the Bin
The biggest lever for indoor bins is what goes in. Bacteria need moisture and food, so reducing both before disposal slows growth at the source.
- Drain liquids first. Pour off broth, sauce, and standing liquid into the sink before scraping food into the bin. Liquid is the fastest route to a wet, smelly bin bottom.
- Seal food scraps. Use a liner or a small compost caddy with a lid. Loose scraps coat the walls and feed bacteria directly.
- Separate wet, perishable waste. Meat, dairy, and cooked leftovers break down fastest. Keep them in a sealed container or the freezer until collection day if your bin sits for several days.
A Practical Indoor Bin Schedule
Outdoor bins can go a month between full cleans. Indoor bins can’t.
- Daily: take food waste out, especially in warm weather. Don’t let it sit overnight if you can avoid it.
- Weekly: rinse the bin and lid, wipe the rim and the underside of the lid, and check the bottom for leaks.
- Monthly: full scrub, disinfect, and air-dry, the same routine you’d use on an outdoor bin.
Cleaning Different Bin Materials Without Damage
Material matters for cleaning and bacteria control: smooth surfaces are easier to clean and less likely to hold odor.
- Plastic bins: the easiest to clean and the least likely to hold odor. Avoid abrasive pads that scratch the surface, scratches trap residue and give bacteria a place to hide.
- Metal bins: look sharp but can rust at seams and hinges. Use mild soap, dry thoroughly, and avoid soaking.
- Bins with wheels and sensors: keep water away from moving parts and electronics. Wipe with a damp cloth and a compatible cleaner rather than hosing them out.
The Mistakes That Undo Your Work
A few habits cancel out even a good cleaning routine:
- Skipping the lid edge and the underside of the lid, where splashes collect and stay damp
- Putting the bin back while it’s still damp
- Using a liner that leaks and never checking the bottom
For indoor bins, line them, rinse weekly, and full-clean monthly. Don’t forget surrounding surfaces, a clean bin next to a grimy cabinet base still leaves bacteria in the room.
How to Tell Your Bin Is Actually Clean
A clean bin has no odor when the lid opens, no visible residue on the walls, and no dampness at the bottom. If you can smell it from a few feet away, it isn’t clean.
Here’s a quick check after cleaning:
- Sniff test: no sour or rotten smell when you open the lid
- Wipe test: a white paper towel run along the wall comes back clean
- Dry test: the bottom and lid are fully dry, not damp
If your bin passes all four, you’ve done the job. If it fails the sniff test, the residue is still there and bacteria are still feeding on it.
After cleaning, leave the bin open in direct sunlight for an hour. UV light and airflow do more to stop bacteria than any spray, and it costs nothing.
When DIY Cleaning Stops Being Enough
DIY cleaning works for most bins, most of the time. But there’s a point where scrubbing with a hose stops solving the problem.
At Chester County Clean Cans, we use 200° hot water and specialized equipment to sanitize, deodorize, and strip grime from residential and commercial bins.
We offer monthly, quarterly, or one-time cleanings. When you sign up, selecting WC Mens Soccer at checkout sends 20% of your sale to the West Chester Henderson Men’s Soccer Team.
Frequently Asked Questions
What can you put in a trash bin to stop maggots?
Maggots need moisture and exposed food waste, so the fix is removal, not a sprinkle. Bag all food waste tightly, keep liquids out of the bin, and rinse the bin after collection. If maggots are already present, empty the bin, then pour boiling water along the bottom and inside walls to kill them, scrub away the residue they were feeding on, and let the bin air-dry in sunlight. Diatomaceous earth along the base can help with repeat problems. Because flies lay eggs within hours in warm weather, cleaning after every collection matters more than any single product.
What is the best way to clean garbage bins?
Empty the bin completely, then rinse loose debris with a hose. Wash the inside, the outside, and the underside of the lid with warm water and dish soap, paying attention to the lid edge and bottom corners where grime collects. Scrub with a stiff brush, dump the dirty water away from storm drains, and rinse until the water runs clear. The step most people skip is drying: tip the bin upside down in direct sunlight until it is fully dry inside. A damp bin restarts bacterial growth within a day.
How often should you clean a garbage bin?
A monthly cleaning is the baseline for most households, with a rinse after every collection if food waste or liquids went in. In summer, or any time temperatures climb, move to every two weeks. Bins that hold pet waste, diapers, or meat scraps need more frequent attention. If you notice odor returning within a few days of cleaning, that is a sign residue is still trapped in scratches or under the lid, and the bin needs a deeper scrub rather than a lighter one.
What can you use to sanitize a garbage bin?
White vinegar, diluted bleach, and boiling water all work, but each has a trade-off. Vinegar handles odor and light bacteria without harming plastic. Diluted bleach, about one tablespoon per gallon of water, disinfects surfaces but must be rinsed well and never mixed with vinegar or ammonia. Boiling water kills maggots and eggs on contact and is safe for plastic if you let the bin cool before adding more. Whichever you choose, the bin must be fully dry afterward, because moisture is what lets bacteria return.
A bin that stays clean is a bin that stays odor-free, pest-free, and easy to live with. If you’re tired of the smell, the maggots, and the chore, let Chester County Clean Cans take it off your plate. Our eco-friendly curbside service uses 200° hot water, finishes within 24 hours, and offers flexible plans to fit your schedule. Get a quote today and see how simple a clean bin can be.