
Last Updated: November 1, 2026
Quick Summary
An eco-friendly trash can cleaning process uses hot water and biodegradable cleaners instead of harsh chemicals to wash, sanitize, and deodorize bins. The DIY process takes about 30 to 45 minutes per bin, scrubbing grime and grease before rinsing and capturing wastewater. Professional service uses 200°F hot water and captures runoff instead of letting it hit your yard or the street.
- Skip bleach and heavy degreasers, which leave a chemical film and harm plants.
- Scrub top to bottom so dirty water runs down, not over clean areas.
- Point rinse runoff toward a bucket or gravel, never a storm drain.
- Most biodegradable sanitizers need 1 to 5 minutes of wet contact to work.
- Clean food-waste bins without a liner every 2 weeks.
Table of Contents
- Why Eco-Friendly Trash Can Cleaning Matters
- What You’ll Need Before You Start
- Step-by-Step: The Eco-Friendly Trash Can Cleaning Process
- How Hot Water Trash Can Cleaning Sanitizes Bins
- Trash Bin Sanitizing and Deodorizing Explained
- Trash Can Cleaning Frequency: Building a Maintenance Schedule
- Inside the Professional Trash Can Cleaning Process
- Common Mistakes to Avoid When Cleaning Your Bins
- Frequently Asked Questions
Why Eco-Friendly Trash Can Cleaning Matters
An eco-friendly trash can cleaning process is a method of washing, sanitizing, and deodorizing bins using hot water and biodegradable cleaners instead of harsh chemicals.
Here’s the problem. A bin left dirty keeps collecting food residue, liquid drips, and grease. That mix feeds bacteria and pulls in pests. The fix is not a stronger chemical. It is a better process.
Health Risks From Bacteria and Germs
Dirty bins are a breeding ground. Why trash bins harbor harmful bacteria explains exactly which bacteria and germs make dirty bins risky. Food scraps and standing liquid create warm, wet conditions where bacteria and germs multiply fast.
Flies and roaches land on the rim, then move to your kitchen. Washing with soap and water helps, but only if you reach the corners and the bottom. Most quick rinses miss both.
Pest Attraction and Odor Control
Odor is the first sign. Maggots and flies follow. Female flies lay eggs in food residue, and those eggs hatch within days in warm weather.
Good odor control starts with removing the source, not masking it. That means scraping out leftover waste, scrubbing grease buildup, and letting the bin dry fully before the lid goes back down.
What You’ll Need Before You Start
Gather your supplies first so you are not hunting for a brush mid-scrub. Here is the short list:
- Heavy-duty rubber gloves and eye protection
- A long-handled stiff brush
- Biodegradable dish soap or a chemical-free cleaner
Skip bleach and heavy degreasers. They kill the good bacteria in your yard and leave a chemical film inside the bin. A biodegradable cleaner does the same job without that trade-off.
Step-by-Step: The Eco-Friendly Trash Can Cleaning Process
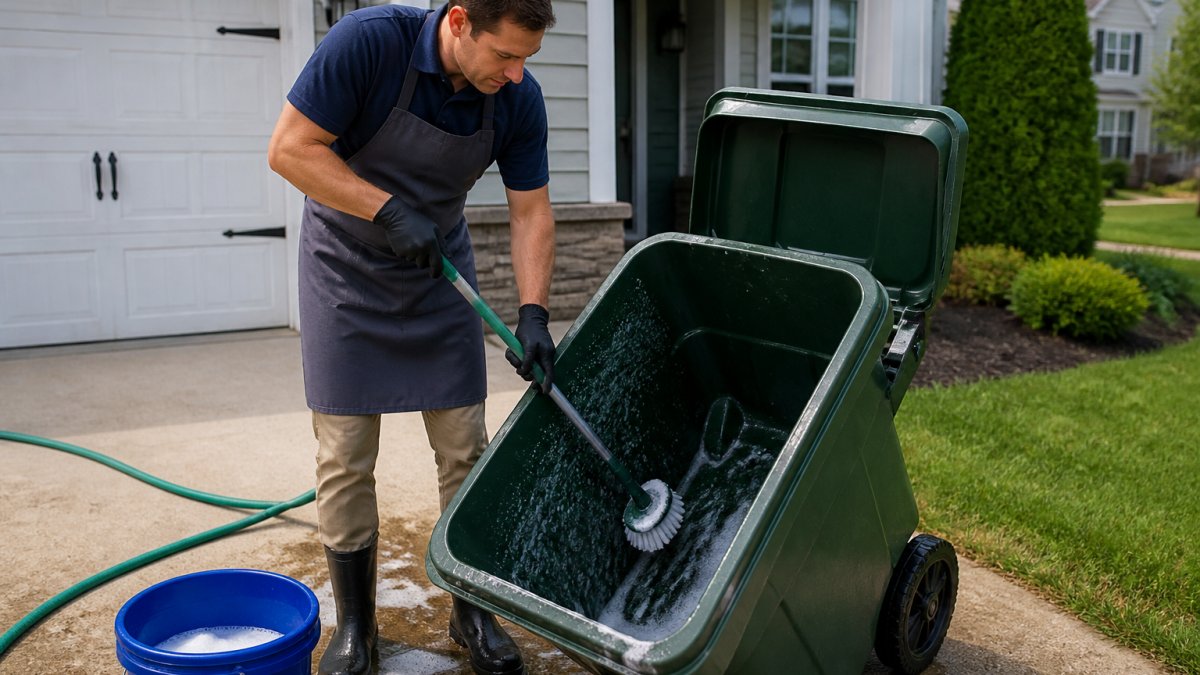
The full DIY process takes about 30 to 45 minutes per bin. Work outside, wear gloves, and keep the bin on a driveway or tarp so runoff stays contained.
Step 1: Remove Leftover Waste and Residue
Tip the bin and dump every loose scrap into a trash bag. Scrape stuck food residue off the sides and bottom with a putty knife or the edge of your brush. Pay attention to the rim and the lid hinge, where liquid pools.
This step does most of the work. Skip it, and you are just spreading grime around with soap.
Step 2: Scrub Grime and Grease Buildup
Mix warm water with a few drops of biodegradable soap in your bucket. Scrub the inside walls, corners, and bottom with the long-handled brush. Work top to bottom so dirty water runs down, not back over clean areas.
Grease buildup on the lower walls needs extra passes. How to remove sticky grime from bins walks through tackling that sticky residue in more depth.
Step 3: Rinse and Capture Wastewater
Rinse with the hose, working from the rim down. Point the runoff toward a bucket or a gravel area, not a storm drain. That wastewater carries food particles and soap, and letting it flow into storm drains sends it straight to local waterways.
Dump the captured water down a household drain or onto soil away from edible plants. Then stand the bin upside down to dry in the sun.
How Hot Water Trash Can Cleaning Sanitizes Bins
Hot water trash can cleaning works by using high-temperature water to break down grease and kill bacteria on contact.
The temperature is the whole point. Cold water pushes grease around. Hot water melts it, lifts it, and carries it off the surface.
Sanitizing is not the same as washing. Washing removes visible dirt. Sanitizing reduces the bacteria and germs left behind.
Trash Bin Sanitizing and Deodorizing Explained
Sanitizing and deodorizing are two different jobs, and most homeowners blur them. Sanitizing reduces the bacteria and germs left after scrubbing. Deodorizing neutralizes the odor compounds those germs produce. Do one without the other and the bin either still smells or still grows.
A Measured DIY Sanitizing Mix
Here is a measured version you can actually follow. Always read your product’s directions first, since concentrations vary.
- Everyday sanitizing spray: 1 tablespoon of biodegradable dish soap plus 1 cup of white vinegar in 1 quart of warm water. Apply to interior walls, rim, and lid, let stand 5 minutes, then rinse.
- Heavier bacterial load (pet waste, diapers, hot weather): 2 tablespoons of baking soda dissolved in 1 quart of warm water, applied after the vinegar spray, let stand 5 minutes, then rinse.
- Contact time matters more than strength. Most biodegradable sanitizers need 1 to 5 minutes of wet contact to work. Spraying and immediately wiping defeats the purpose.
Never mix vinegar and bleach, or bleach with any ammonia-based cleaner. The combination releases toxic gas. If you used bleach on a prior cleaning, rinse the bin thoroughly and let it dry before applying an acid-based cleaner.
Deodorizing That Actually Works
Deodorizing fails when it is applied over grime. A spray over residue covers the smell for a day and makes it worse by the end of the week. Remove the residue first, then treat the surface.
- Baking soda, dry: Sprinkle a thin layer in the bottom of a fully dry bin between pickups. It absorbs odor rather than masking it. Replace it when you next wash the bin.
- Baking soda, wet: A paste of 3 parts baking soda to 1 part water applied to the bottom and lower walls, left 10 minutes, then rinsed, lifts lingering odor from porous plastic.
- Sun and air: The cheapest deodorizer is a fully dry bin left open in direct sun for an hour. UV exposure and airflow do more than most sprays.
Safety and Protective Equipment
Bin cleaning exposes you to contaminated residue, splashing, and cleaning fumes.
- Gloves: Heavy-duty rubber or nitrile gloves, not disposable food-prep gloves.
- Eye protection: Safety glasses or goggles, especially when spraying upward at the rim and lid.
- Ventilation: Work outdoors or in a well-ventilated garage with the door open. Never clean bins in an enclosed space.
Material-Specific Precautions
- Plastic bins and wheeled carts: Tolerate warm water and mild cleaners well. Avoid water above roughly 140°F from a home hose setup, which can warp thin plastic. Use a stiff brush, not a metal scraper, to avoid scuffing that traps grime.
- Metal bins: Dry thoroughly after rinsing to prevent rust at seams and the lid hinge. Avoid acidic cleaners left in contact for long periods.
- Cracked or older bins: Use a softer brush and lower water pressure so cracks do not widen and hold moisture.
Once the bin is clean, sanitized, and fully dry, close the lid. Moisture trapped under a closed lid restarts bacterial growth within a day.
Trash Can Cleaning Frequency: Building a Maintenance Schedule
Most frequency advice stops at “every few weeks.” A real schedule responds to what is in the bin, the weather, and what you see and smell. Use the baseline below, then adjust with the triggers that follow.
| Situation | Baseline Frequency | Why It Matters |
|---|---|---|
| Food waste, no liner bag | Every 2 weeks | Fastest bacteria and pest growth |
| Standard household bin with liner | Every 3-4 weeks | Balances effort and hygiene |
| Recycling bin | Every 1-2 months | Sticky residue builds slowly |
| Pet waste or diapers | Weekly | Highest odor and germ load |
| Cooler months | Every 1-2 months | Slower growth, still needs cleaning |
Triggers That Mean Clean It Now
A calendar is a floor, not a ceiling. Clean sooner when any of these appear:
- Visible liquid at the bottom, standing leachate means bacteria are already active.
- Persistent odor after the lid is closed, masking has stopped working.
- Flies or maggots, the reproductive cycle has started and a rinse will not break it.
Adjusting for Material and Bin Type
- Plastic wheeled carts handle the standard schedule well and tolerate warm water and mild cleaners.
- Metal bins need more frequent drying checks; clean on schedule but dry immediately after every wash to prevent rust at seams.
- Small indoor kitchen bins should be wiped weekly and deep-cleaned monthly, since they hold food waste closest to living space.
A Simple Maintenance Rhythm
A maintenance schedule beats a deep clean every few months. A common pattern that works for most households:
- Weekly: Wipe the rim and lid, check for liquid at the bottom, and sprinkle baking soda in a dry bin.
- Every 2-4 weeks (warm months): Full wash, sanitize, and deodorize per the process above.
- Monthly: Inspect for cracks, worn brushes, and residue buildup in the lid hinge.
- Seasonally: Deep-clean recycling bins and reassess the schedule as temperatures change.
Small, regular washes keep grime from ever building up. If the DIY routine stops fitting your week, a recurring trash bin cleaning service from Chester County Clean Cans can take it off your list. Residential trash bin sanitizing services covers how a recurring professional option fits a maintenance schedule.
Inside the Professional Trash Can Cleaning Process
The professional trash can cleaning process follows the same logic as the DIY version, with better equipment. How it works shows what the service actually involves before you decide to book. Our service uses 200° hot water to clean each bin and captures the runoff instead of letting it hit your yard or the street.
Here is what a typical visit looks like:
- You leave bins curbside after pickup
- The crew cleans and sanitizes each bin on the truck
- Wastewater is captured and disposed of properly
Service is completed within 24 hours of your pickup. You can book a one-time cleaning or set up monthly or quarterly service.
Common Mistakes to Avoid When Cleaning Your Bins
Most bin problems trace back to a few repeat mistakes. Watch out: rinsing without scrubbing leaves a grease film that restarts odor within days. Soap alone does not cut grease.
Other mistakes we see often:
- Letting runoff flow into storm drains instead of capturing it
- Closing the lid on a wet bin, which traps moisture and odor
- Using bleach, which leaves a chemical film and can harm plants
Material matters too. Plastic bins handle hot water well. Cracked or older bins need a gentler brush so the plastic does not scuff and hold grime.
Frequently Asked Questions
How does professional trash can cleaning work?
A professional crew cleans bins curbside, usually after your scheduled pickup. Our service uses 200° hot water to clean the bin and captures the runoff rather than letting it run into your yard or storm drain. Most services finish within 24 hours of pickup, so you simply leave the bin out and it is clean when you get it back.
What is the most eco-friendly way to clean a trash can?
Skip harsh chemicals and use hot water, a biodegradable or chemical-free cleaner, and a stiff brush. Mix a small amount of castile soap or white vinegar with warm water, scrub the inside and outside, and rinse thoroughly. Capture the runoff in a bucket or on a lawn area instead of letting it flow toward a storm drain. This approach removes grime and food residue without leaving chemical residue behind, and it keeps the wastewater out of local waterways.
What happens to the wastewater from trash can cleaning?
Responsible cleaning captures the runoff instead of sending it down a storm drain. At home, wash bins on a grassy or gravel area away from drains, or use a bucket to collect the dirty water and dispose of it in a utility sink or toilet. This matters because storm drains often flow directly to streams and rivers without treatment.
How often should you have your trash bins cleaned?
Most households do well with monthly cleaning during warm months and quarterly cleaning in cooler weather. If you deal with maggots, strong odors, or pest problems, clean more often, at least every two to four weeks until the issue clears. Recycling bins can go longer between cleanings since they hold fewer food residues. A regular schedule prevents grime and grease buildup from hardening and keeps odor control manageable year-round.
Cleaning your bins the right way takes supplies, time, and a tolerance for the gross parts. Chester County Clean Cans handles it for you with 200° hot water, eco-friendly methods, and curbside service completed within 24 hours. We offer monthly, quarterly, and one-time plans, so you can try it once or set it and forget it. Get started with Chester County Clean Cans and keep your bins fresh-smelling and hygienic year-round.
